Jump to User Manual Pdf | Jump to Installation Manual Pdf
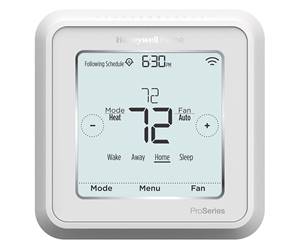
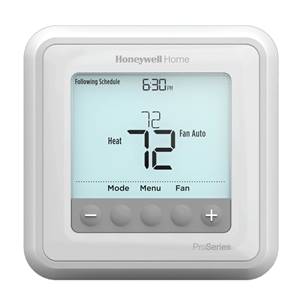
Applies to models : TH6320U2008 , TH6220U2000 , TH6210U2001
3 Heat / 2 Cool : TH6320U2008
2 Heat / 1 Cool : TH6210U2001
2 Heat / 2 Cool : TH6220U2000
System operation settings
1 Press the Mode button to cycle to the next
available System mode.
2 Cycle through the modes until the required
System mode is displayed and leave it to
activate.
NOTE: Available System modes vary by model and
system settings.
System modes:
‒ Auto
‒ Heat
‒ Cool
‒ Em Heat
‒ Off
Fan operation settings
1 Press the Fan button to cycle to the next
available Fan mode.
2 Cycle through the modes until the required Fan
mode is displayed and leave it to activate.
NOTE: Available Fan modes vary with system
settings.
Fan modes:
‒ Auto: Fan runs only when the heating or cooling system
is on.
‒ On: Fan is always on.
‒ Circ: Fan runs randomly about 33% of the time.
Set the time and date
Time
1 Press Menu on your thermostat.
2 Press or to go to TIME. Press Select.
3 Press or to choose between 12 or 24 hour.
Press Select.
4 Use or to adjust the hour. Press Select.
5 Use or to adjust the minutes. Press Select
to exit Time menu.
Date
1 If previously setting time, continue to Step
2. If at the Home screen, press Menu on your
thermostat.
2 Press or to go to DATE. Press Select.
3 Use or to adjust year. Press Select.
4 Use the or to adjust month. Press Select.
5 Use the or to adjust day. Press Select to
save and exit Date menu.
Program Schedule
You can program four time periods each day, with different settings for weekdays
and weekends. We recommend the pre-sets (shown in the table below), since they
can reduce your heating/cooling expenses.
Wake – Set to the time you wake up and the
temperature you want during the morning, until
you leave for the day.
Away – Set to the time you leave home and the
temperature you want while you are away (usually
an energy-saving level).
Home – Set to the time you return home and the
temperature you want during the evening, until
bedtime.
Sleep – Set to the time you go to bed and the
temperature you want overnight (usually an
energy-saving level).
NOTE: To temporarily or permanently override any of the above program
schedules, see page 4.
To adjust program schedules
1 Press Menu on your thermostat.
2 PROG is displayed. Press Select. Then ON
is displayed. (If you do not want to use a
schedule, press or to display OFF. Press
Select.) Press Select.
3 Press or to select day or set of days to
edit. Press Select.
4 Press or to select a schedule period to
edit (Wake, Away, Home, and Sleep). Press
Select.
5 ON is displayed. Press Select to keep the
schedule period on. Or press and then Select
to turn off the schedule period.
6 Time starts blinking. Press or to adjust
the schedule period start time. Press Select.
7 Temperature starts blinking. Press or
to adjust the “Heat” setpoint temperature.
Press Select. Press or to adjust the “Cool”
temperature setpoint. Press Select.
8 Repeat steps 4 through 7 for the remaining
schedule periods.
9 Press Home when you’re finished to save and
return to the home screen.
10 Schedule can be adjusted and turned ON or
OFF by returning to Menu and following the
steps provided above
Program schedule override (temporary)
1 Press + or – to adjust the temperature.
2 Once at the desired setpoint temperature,
no further action is needed. The new
setpoint temperature will be held until the
next scheduled time period begins. For more
information on schedule time periods, see
“Program Schedule” on page 3.
3 To cancel the Temporary Hold, Press + or –
and then press Cancel
Program schedule override (permanent)
1 Press + or – to adjust the temperature.
2 TEMPORARY HOLD is displayed and
the setpoint temperature flashes. While
it’s flashing, press Hold (Mode) button to
change to Permanent Hold.
3 To cancel the Permanent Hold, press + or –
and then press Cancel
Adjusting keypad lockout
1 Press Menu on the thermostat.
2 Press + or – to go to LOCK. Press Select.
3 Press + or – to go to OFF, PART, or ON, and then press Select.
OFF: Unlocked, and full access allowed.
PART: Partial lockout, allowing only the temperature to be changed.
ON: No access allowed.
4 To unlock the keypad, press the CENTER button and then enter the password
“1234”. To enter the password, press + or – to change the first digit of the
number. Then press Select. Repeat this process to enter the second through
fourth digits of the number. Once all four numbers have been entered, press
Select again.
5 This will unlock the keypad.
6 If the code is incorrect, the screen will flash the lines “–“.
7 Press Back to go back a step to enter the correct number and press Select.
NOTE: On some models, the keypad lockout setting is not available in the user
menu if the installer didn’t configure the thermostat to allow this setting.
Adaptive Intelligent Recovery
Over time, the T6 Pro Thermostat “learns” how long it takes your system to reach
the temperature you want. It turns on the heating or cooling system earlier to
make sure you’re comfortable at the time you expect.
Built-in compressor protection
Damage can occur if the compressor is
restarted too soon after shutdown. This
feature forces the compressor to wait for a few
minutes before restarting.
During the wait time, the display will flash
the message Cool On (or Heat On if you have
a heat pump). When the safe wait time has
elapsed, the message stops flashing and the
compressor turns on.
Battery replacement
Batteries are optional (to provide backup
power) if your thermostat was wired to run on
AC power when installed. If your thermostat
was not wired to run on AC power, then
batteries are required.
Install fresh batteries immediately when the
low battery icon appears. The icon appears
about two months before the batteries are
depleted.
Even if the low battery icon does not appear,
you should replace batteries once a year, or
before leaving home for more than a month.
If batteries are inserted within two minutes, the
time and day will not have to be reset. All other
settings are permanently stored in memory,
and do not require battery power.
NOTE: When replacing batteries, alkaline
batteries are recommended
Alerts
If there is an alert or reminder, the alert icon
appears on the Home screen.
Low Battery Warning
1 The batteries need to be replaced when
BATT, the alert icon , and the battery icon
are displayed on the Home screen.
2 When the battery power is very low, the
thermostat’s backlight is disabled to save
battery power.
3 When battery power is critically low, only
BATT, the alert icon , and the battery icon
are displayed.
Air Filter Reminder
1 The alert icon appears on the Home
screen.
2 Press Menu, and then press until display
shows ALRT.
3 Press Select to display which alert(s) are
present.
4 The message REPL (REPLACE AIR FILTER)
appears.
5 The reminder can be snoozed or cleared.
Resideo recommends changing the air filter
before clearing the reminder.
6 To snooze, press Select. The word SNZE
(SNOOZE) appears.
7 Press Select again to snooze the reminder for
7 days.
8 To clear, press Select, and then press to go
to CLER (Clear).
9 Press Select to clear the air filter reminder.
Snoozing and Clearing Alerts or
Reminders*
1 Press Menu, and then press + until display
shows ALRT.
2 Press Select to display which alert(s) are
present.
3 The word SNZE (SNOOZE) appears.
4 Press Select again to snooze the reminder for
7 days.
5 To clear the alert, press Select, and then
press + to go to CLER (Clear).
6 Press Select to clear the reminder.
* Some alerts cannot be snoozed or cleared.
Please call your local heating and cooling
professional if this occurs. The heating and
cooling system may require service.
Troubleshooting
If you have difficulty with your thermostat, please try the following suggestions.
Most problems can be corrected quickly and easily.
Display is blank
• Check circuit breaker and reset if necessary.
• Make sure power switch for heating & cooling system is on.
• Make sure furnace door is closed securely.
• Make sure fresh AA alkaline batteries are correctly installed
(see pdf page 6).
Heating or cooling system does not respond
• Press Mode button to set system Heat (see page 2). Make
sure the desired temperature is set higher than the inside
temperature.
• Press Mode button to set system Cool (see page 2). Make
sure the desired temperature is set lower than the inside
temperature.
• Check circuit breaker and reset if necessary.
• Make sure power switch for heating & cooling system is on.
• Make sure furnace door is closed securely.
• Wait 5 minutes for the system to respond.
Temperature settings do not change
Make sure heating and cooling temperatures are set to
acceptable ranges:
• Heat: 40 °F to 90 °F (4.5 °C to 32.0 °C)
• Cool: 50 °F to 99 °F (10.0 °C to 37.0 °C)
“Cool On” or “Heat On” is flashing
• Compressor protection feature is engaged. Wait 5 minutes
for the system to restart safely, without damage to the
compressor (see page 5).